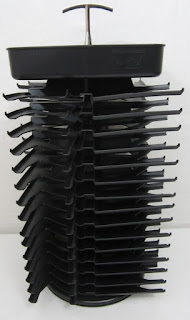
picture from pinterest
In the early days of my stamping, I loved my Stampin Up! Ink Pad
holder. All my pads right there on my work table right in front of me! They are a bit expensive but I
saved my pennies to purchase it. But like most of us, over time my ink pad
collections grew while the tower did not.
At one point it held the odd
distress and Staz-on ink pads, but eventually I outgrew the tower, again. So,
it sat in the corner of my spare bedroom collecting lots - and lots - and lots
of dust! Lord this thing is a dust magnet! LOL
Anyway, since my family is now
practicing social distancing during the current Covid-19 Pandemic I have been
cleaning up and out my craft room and supplies. I thought about donating but
decided to give it another shot at usefulness by creating some small drawers
and turning it into rotating storage for my embellishments which I have also
been going through.
Here's what you are going to need if you want to try this
yourself. I also created a sheet showing the score lines and cut lines which will be at the end of the post. Please note that all measurements are in inches.
- 12 sheets of 8.5 x 11 card stock
- Optional - add 4 more sheets (16 total) to make boxes for the top of the tower
- Bone Folder
- Labels (Optional)
- Paper Trimmer
- Punch for a Tab (I used a tab punch from Stampin Up! cut in half)
- Scissors
- Score board
- Strong glue or adhesive tape (I used Art Glitter Glue)
To make the drawers, score 12 of the card stock
sheets as follows
Score on the short side at
.75"
3.50"
5"
7.75"
Turn
Score on the long side at
.75"
4.75"
6.25"
10.25"
Using the paper trimmer, cut the card stock into four 4.25 x 5.50
(4-1/2” x 5-1/2”) pieces (A2 size)
Using the scissors clip a small wedge from each corner to facilitate a clean closure
Using your bone folder, create nice crisp folds along the score lines
Next, start folding in and glueing the corners
Almost finished drawer
Adhere tabs on the bottom
Thats it! All done. Now you can add a label. I do suggest that if you are planning to hand write onto the drawers to do so before glueing into shape.
If you want to make the boxes for the tops you will need the extra 4 pieces of card stock.
Cut into 8.50" x 8.50" square
Score at 2.50" and 5.75"
Turn
Score at 2.50" and 5.75"
As with the drawers, trim a small wedge from each corner and use your bone folder to create nice crisp folds. Then start folding in and glueing.
Here is the layout for the drawers
Thanks for stopping by!
I hope you enjoyed this simple tutorial!
(Hugs) Cara


5 comments:
Fantastic project, great idea, hugs, Lori m
You are a genius. Thank you for showing us how to re-purpose.
thanks so much for sharing what you created for the ink pad tower. I will be using this as an embellishment tower too. now that I have the instructions, it should be quick and easy. I really appreciate everyone that shares their genius ideas. happy crafting from Beth Cassel, Ontario, Canada
Wow...I would have loved this! Unfortunately I just sold mine this past summer as I have all the new SU ink pads and did not like how they fit into this holder. HOWEVER, this is a great repurpose for it!
Thank you for sharing this! I was trying to find a use for my 2 spinners and this idea was perfect!! In addition to your style drawers I created some with "lids".
Post a Comment